Adding Administrative Areas and Locations in SCOPE
Introduction
Overview
In addition to providing SSD administrative areas and locations in the CO Initial Setup Data File, Programme can add administrative areas in SCOPE directly.
You can manage administrative areas by performing the following actions:
-
Geographic areas, also called administrative areas, are large regions (e.g., provinces) within a country where interventions are planned.
You can add administrative areas and locations in bulk by uploading an Excel file. This is similar to how locations are provided in the CO Initial Setup Data File. This is the only way for Programme to add top level administrative areas in SCOPE without assistance from SSD.
-
Sub areas are smaller regions (e.g., districts or localities) within geographic areas that can be targeted for specific distribution cycles.
You can add sub areas to existing administrative areas in SCOPE. You cannot add top level administrative areas this way.
-
Locations are specific distribution sites (e.g., refugee camps) within administrative areas.
You can add locations to administrative areas in SCOPE.
Who is responsible for Adding Administrative Areas and Locations in SCOPE?
Programme is normally responsible for adding administrative areas and locations in SCOPE. Check with your Country Office to confirm who in Programme is responsible in your country.
Why is Adding Administrative Areas and Locations in SCOPE important?
Administrative areas and locations are basic information required to set up interventions and register people’s identities that can be grouped by households. If administrative areas and locations are not in SCOPE, you cannot setup up interventions or register people's identities for those areas or locations.
What do I need to do before Adding Administrative Areas and locations in SCOPE?
- The Country Office must already be set up in SCOPE by SSD.
- Ensure that VAM (or the relevant alternate colleagues) have approved all of the administrative areas and locations that you intend to set up. Failure to do so will cause problems further along in the use of SCOPE, particularly if the administrative areas and locations need to be changed.
If you are importing geographic areas using an Excel file, you must know whether you are importing administrative areas and locations or only administrative areas. When creating the Excel file, be aware of the following:
- Each column corresponds to an administrative area level for your country office
- The top row of the Excel sheet contains the column headers which are the labels for each administrative level
- If you are importing locations, the last column contains your list of locations
Where can I learn more?
For more information on administrative areas and locations, click here to explore related Digital Assistance Services Academy Learning Channel materials.
Instructions
Importing Geographic Areas
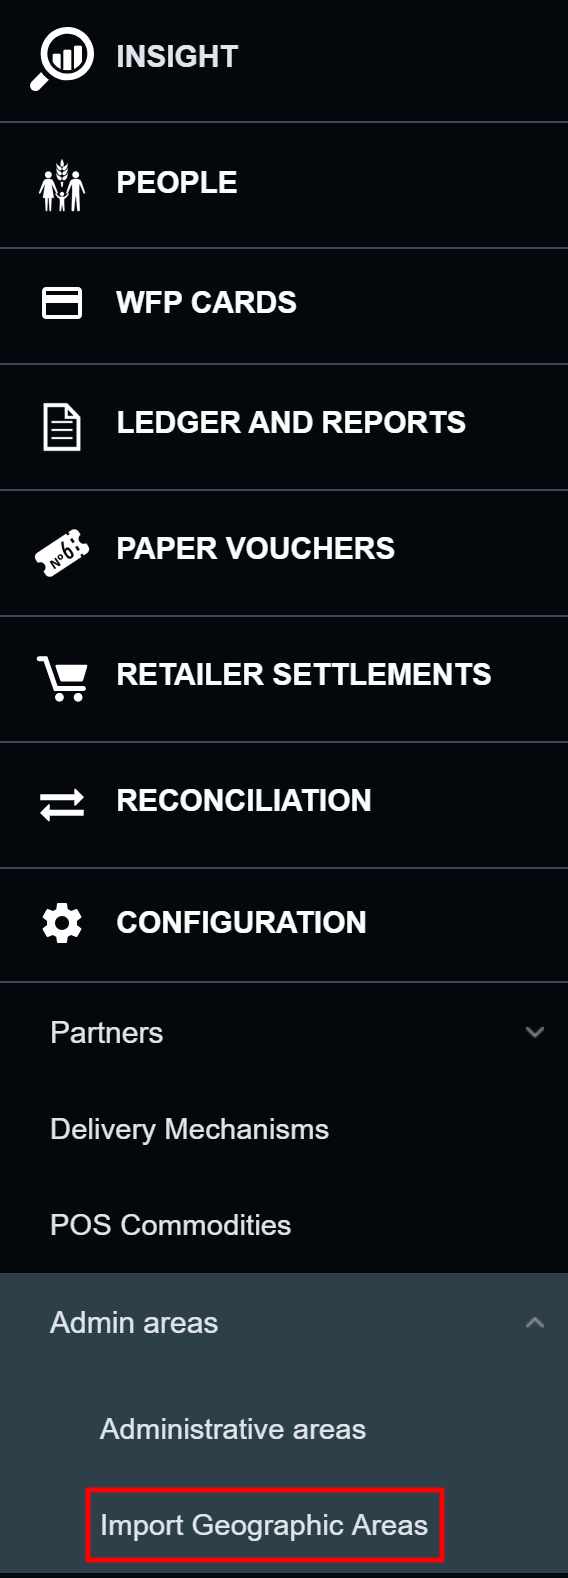
To import geographical areas into SCOPE, log in to SCOPE and perform the following steps:
-
In the Country Office page, click in the menu.
-
In the Upload and import geographical areas data from excel file page, select Dry run the import.
Note: Dry run allows you to test your excel sheet and make sure the results are correct. You can skip this option if you are confident in your data. However, it is strongly recommended that you use it. Projects, interventions, and registrations are based on the administrative areas and locations you enter here. If mistakes are made here it is difficult to correct them further along in the SCOPE process. SSD will need to manually correct the data, which takes a lot of time and may cause issues with existing projects and interventions.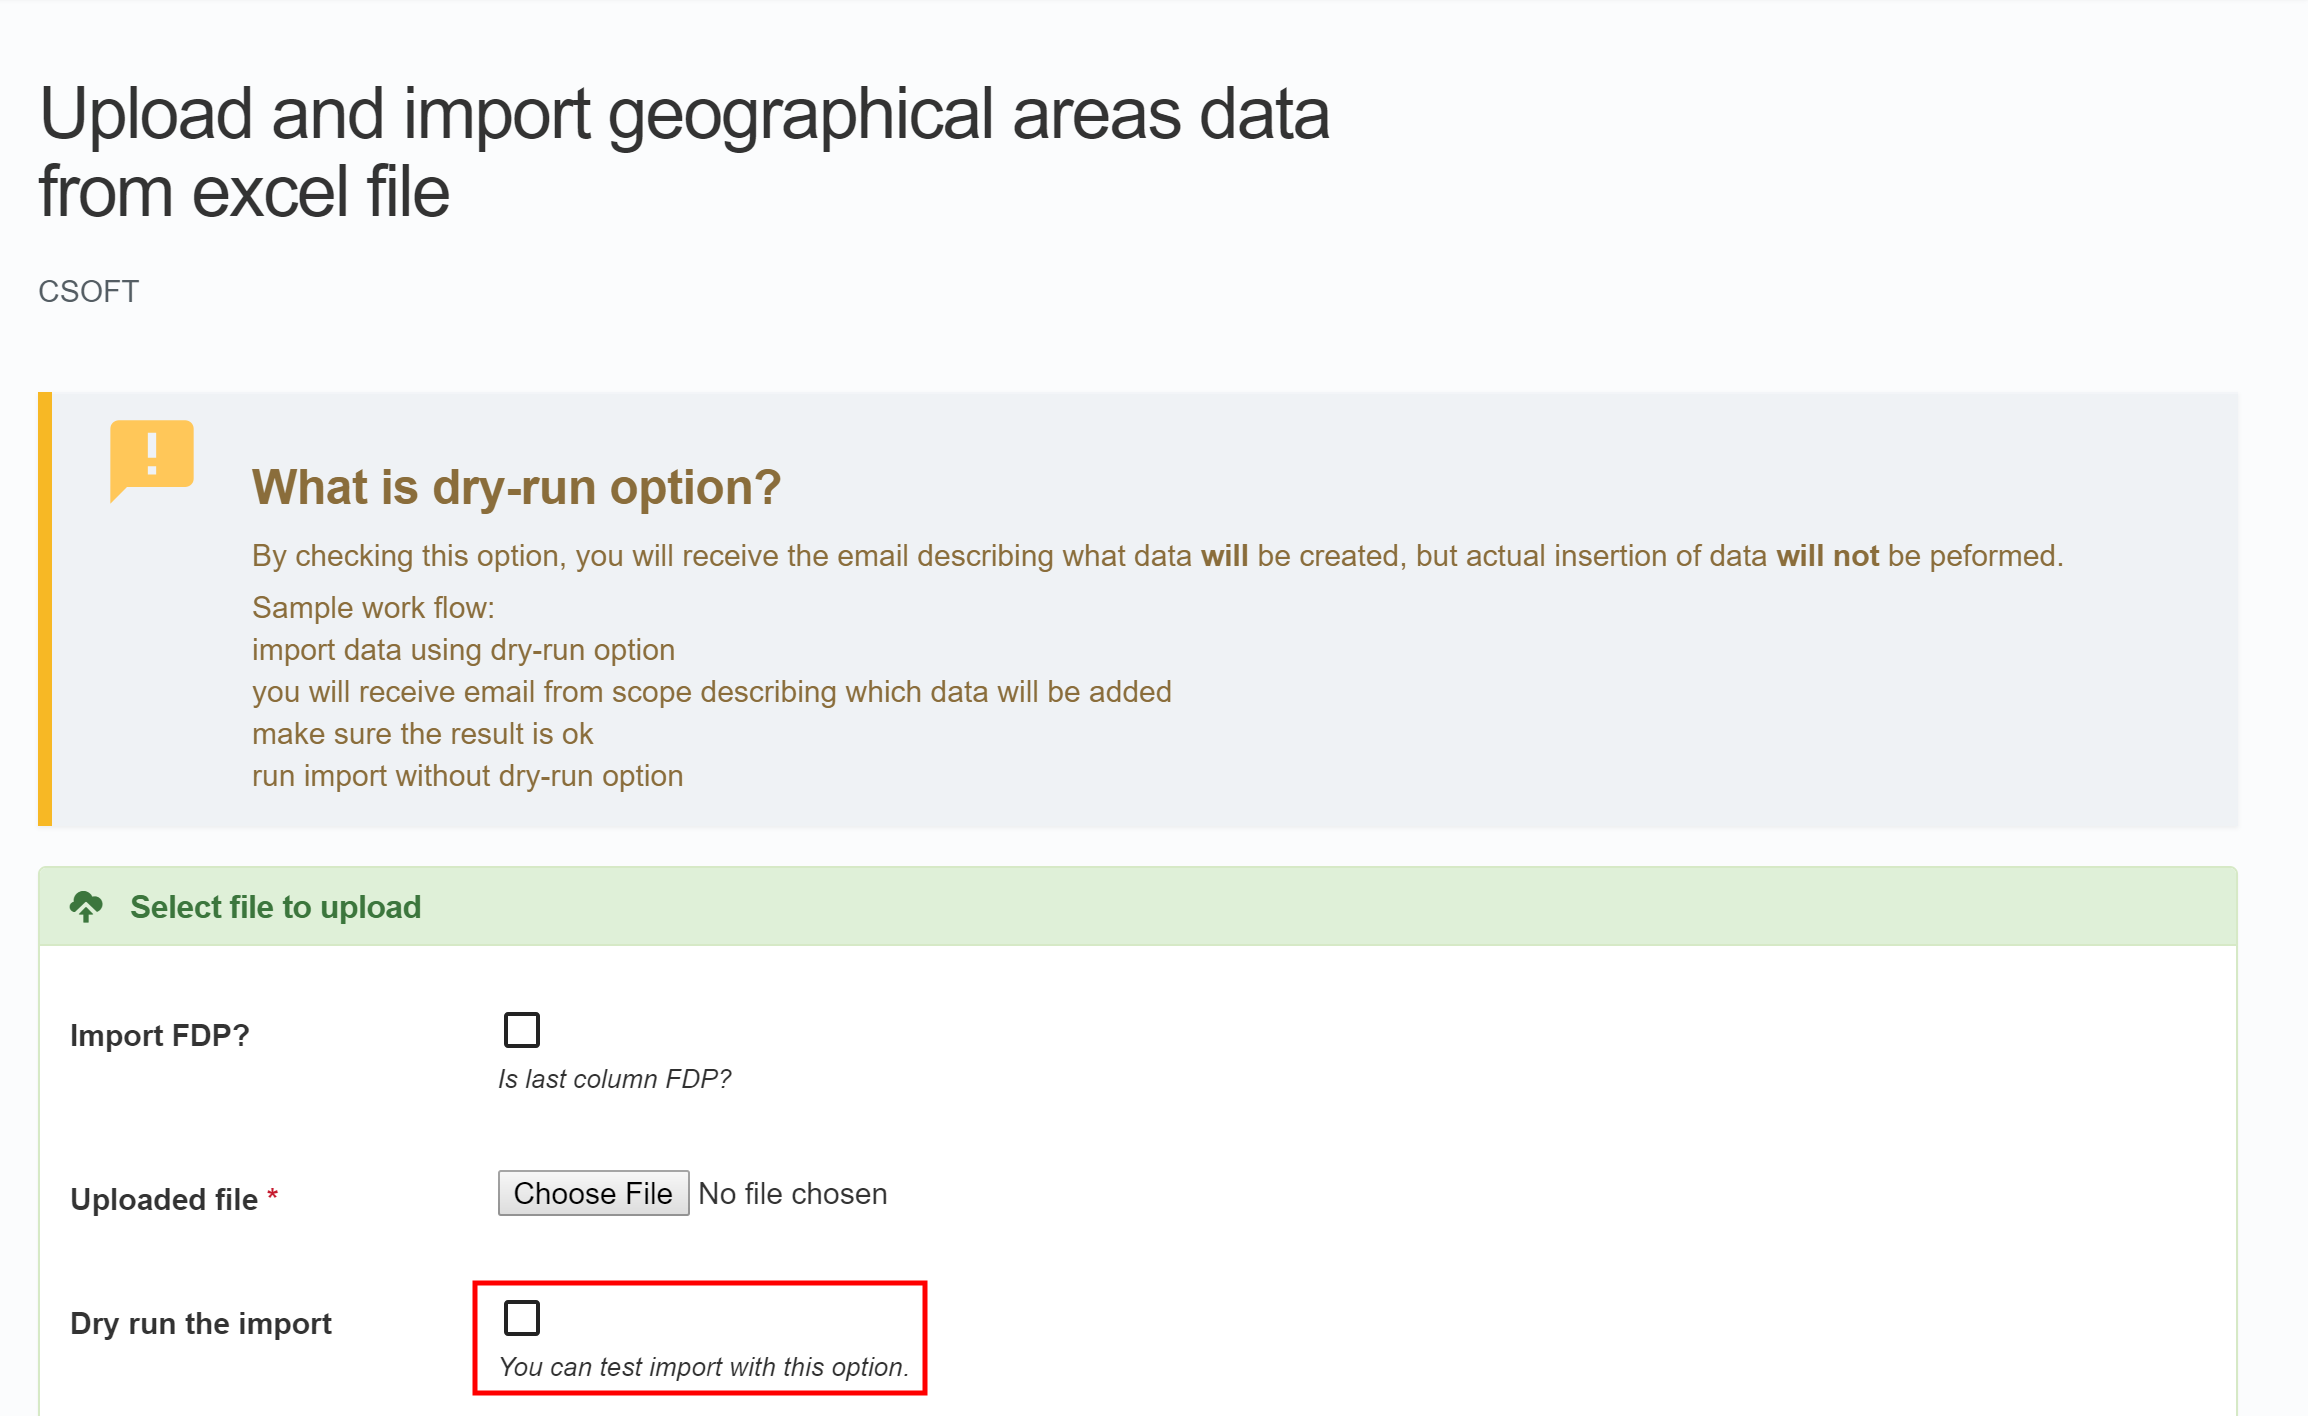
-
If you are adding locations (i.e., FDPs) as well as administrative areas, select Import FDP?. If you select this option, the last column in the Excel file will be imported as locations rather than as administrative areas.

-
Click .

-
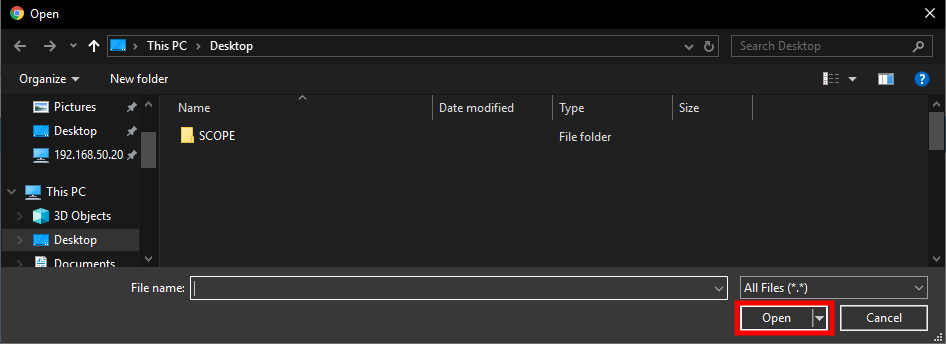
Browse to the target Excel file, select it, and click .
-
Click .

-
You will automatically receive an email with a URL link to the results of the dry run. Check that the results are what you planned.
- If the results are what you planned, repeat this process, but do not select the Dry run the import option.
- If the results are not what you planned, adjust the data in the Excel sheet and test it again with a dry run.
Adding Sub Areas
To add sub areas directly in SCOPE, log in to SCOPE and perform the following steps:
-
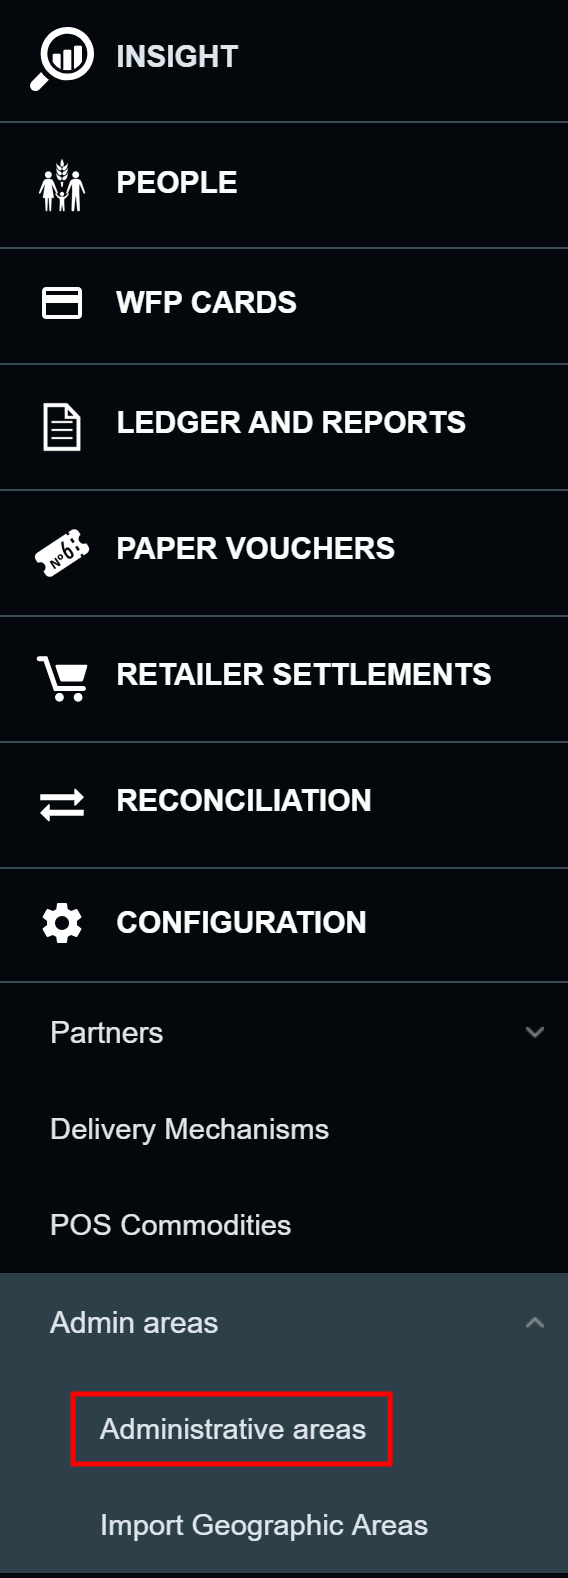
In the Country Office page, click in the menu.
-
In the Administrative areas page, click on the top level administrative area you want to add a sub area to.
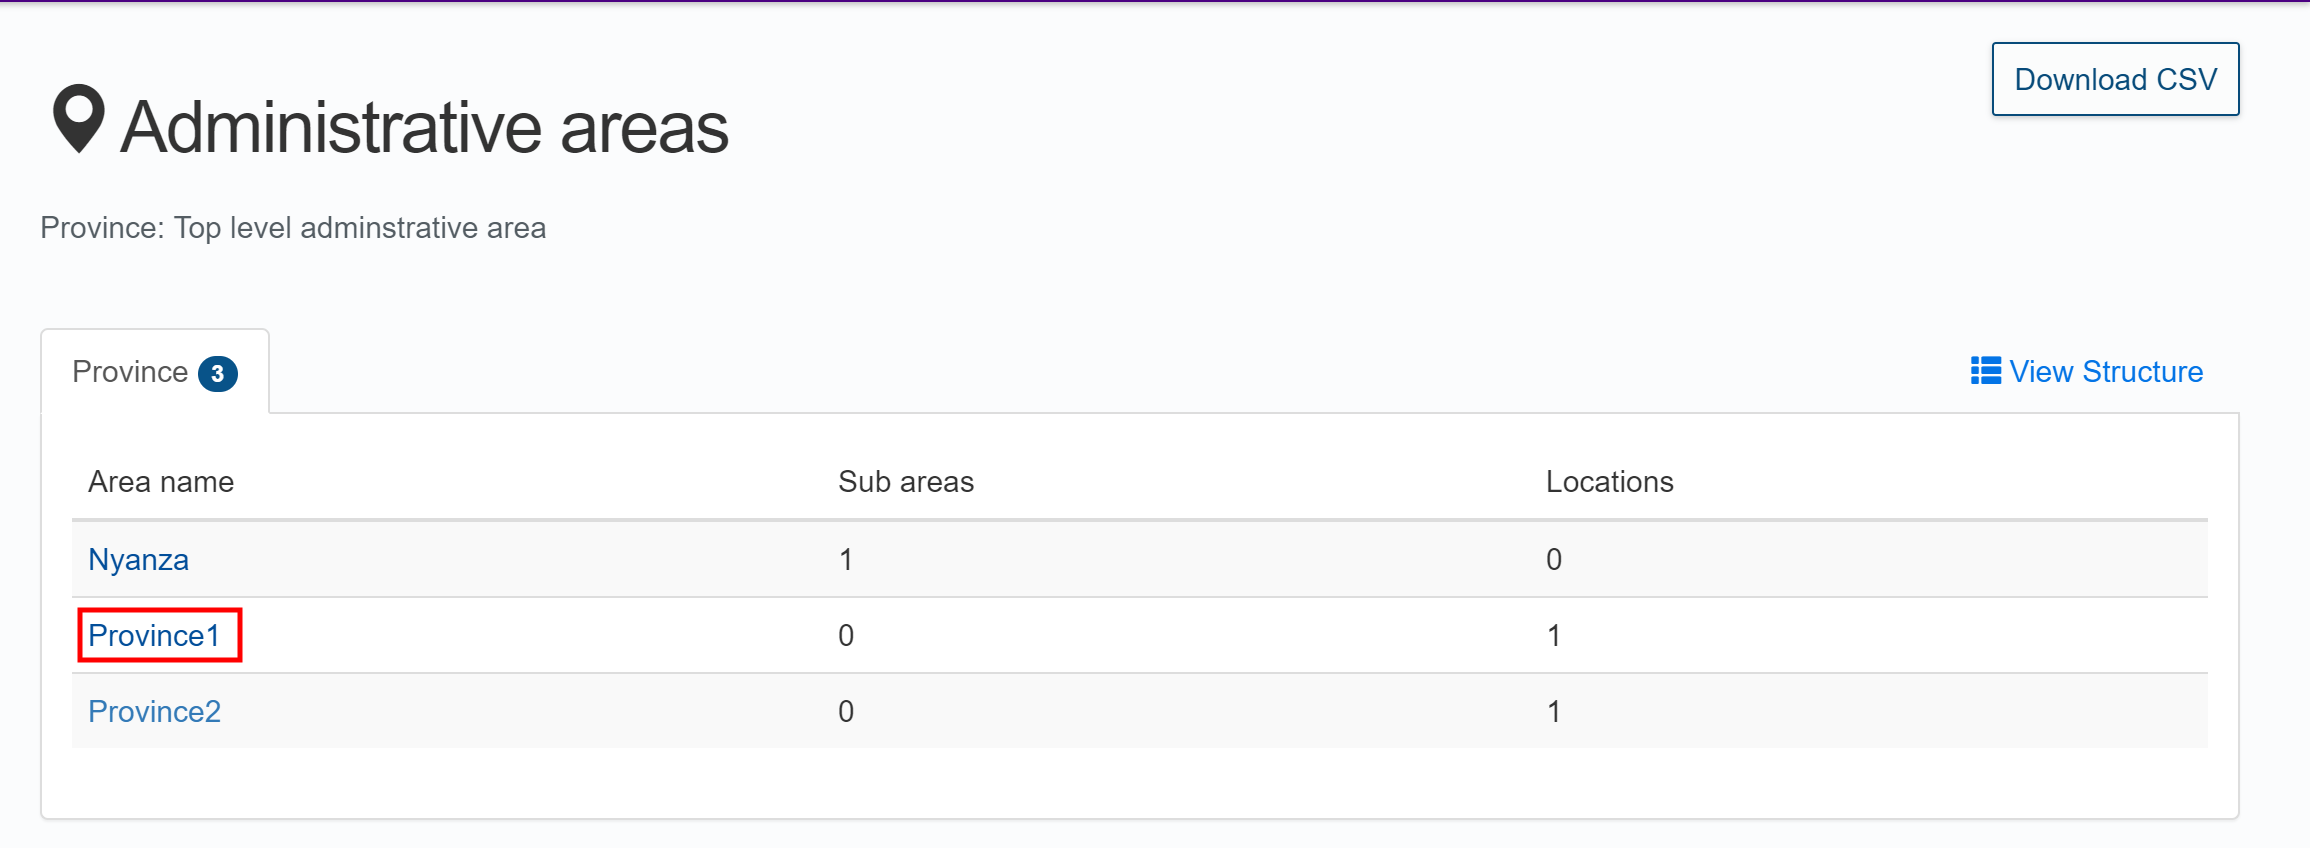
Note: These instructions are for adding a sub area to a top level administrative area. If you need to add a sub area to a lower level administrative area instead, use the Sub areas tab to navigate to the target administrative area.
-
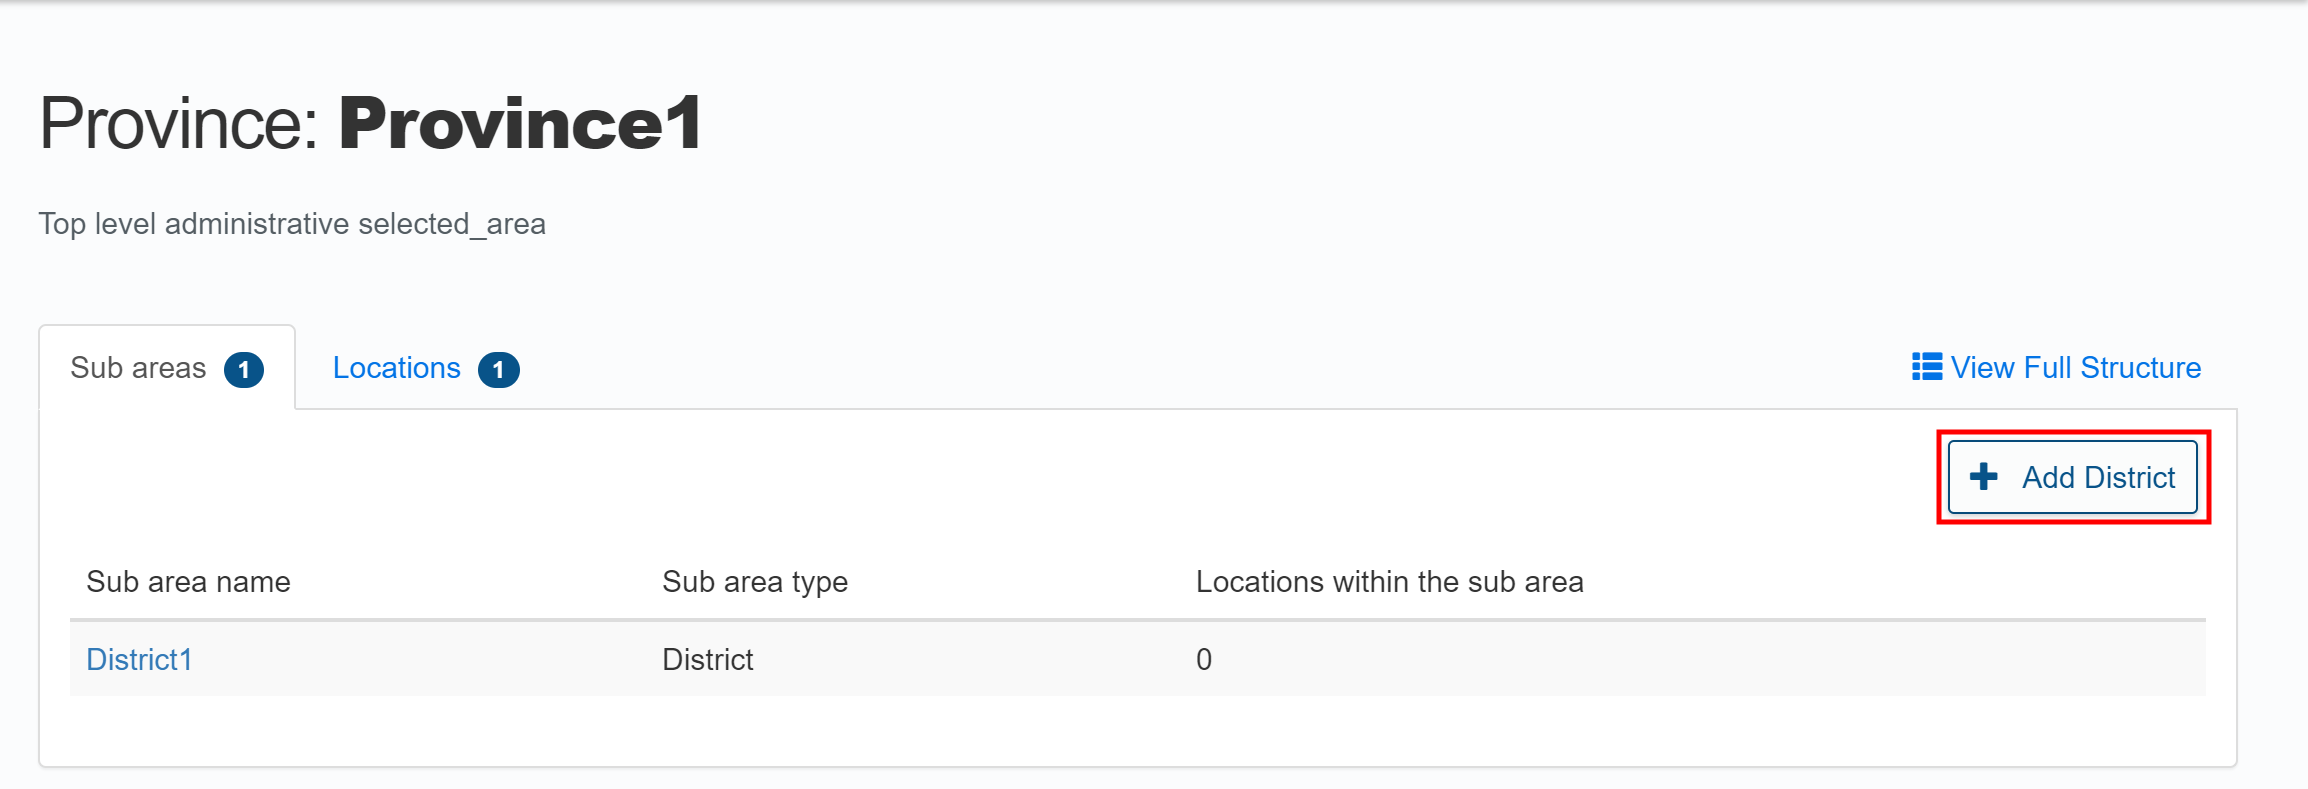
In the Sub areas tab of the target administrative area, click to add a sub area.
Note: The add sub area button will always be in the location shown below. However, the name of the button will vary based on what administrative area level you are at, and the administrative area levels that were named.
-
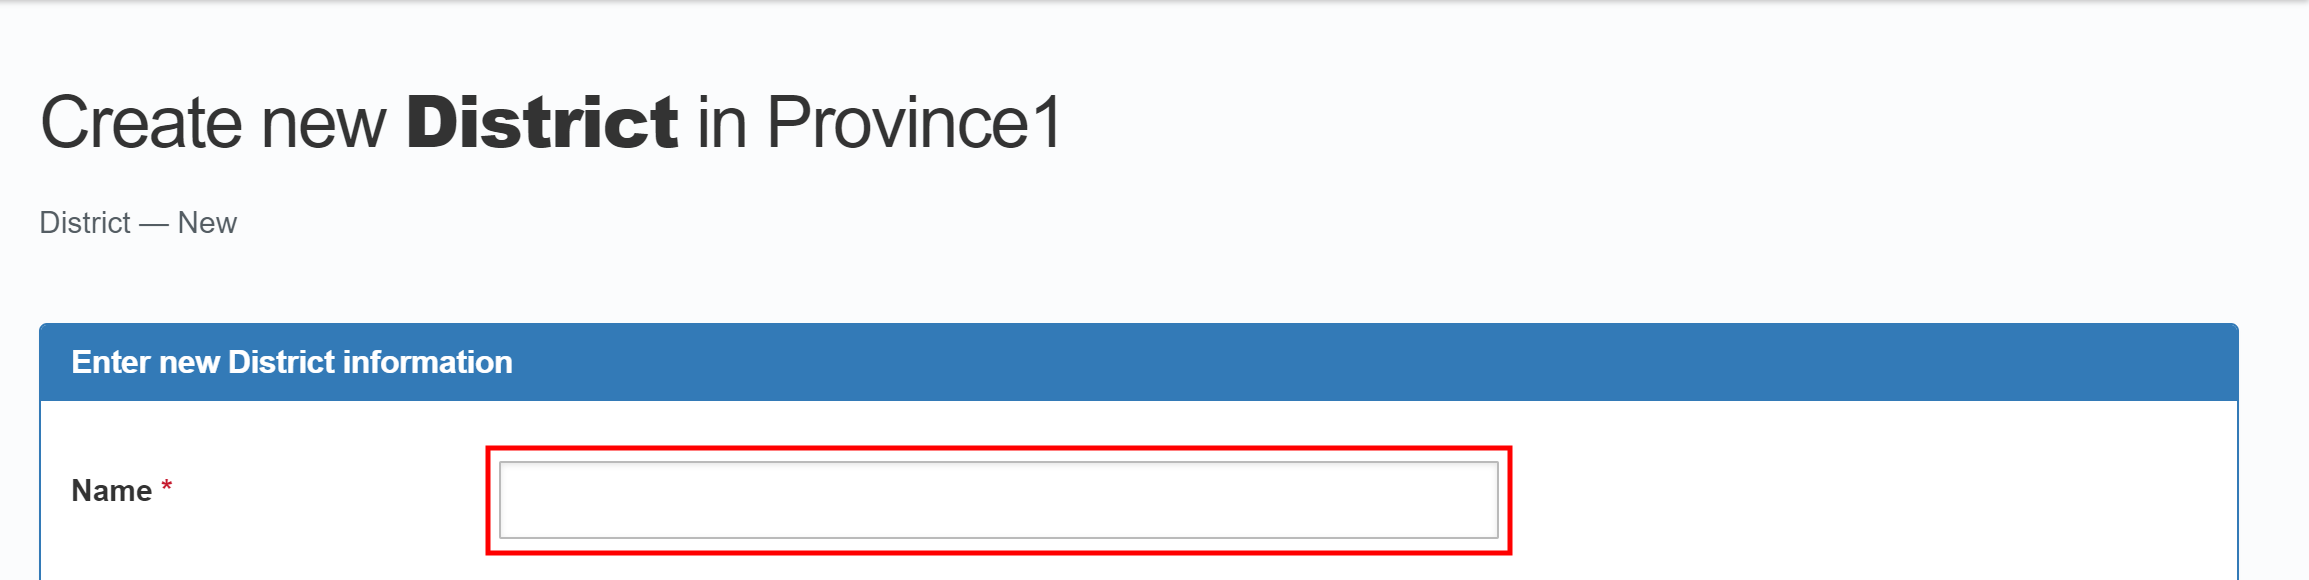
In the Create new sub area page, enter the name for the sub area and enter any other details required by your Country Office.
-
Check that the details are correct, and click to finish adding a sub area.

Adding Locations
To add locations directly in SCOPE, log in to SCOPE and perform the following steps:
-
In the Country Office page, click in the menu.
-
In the Administrative areas page, click on the top level administrative area you want to add a location to.
Note: These instructions are for adding a sub area to a top level administrative area. If you need to add a sub area to a lower level administrative area instead, use the Sub areas tab to navigate to the target administrative area.
-
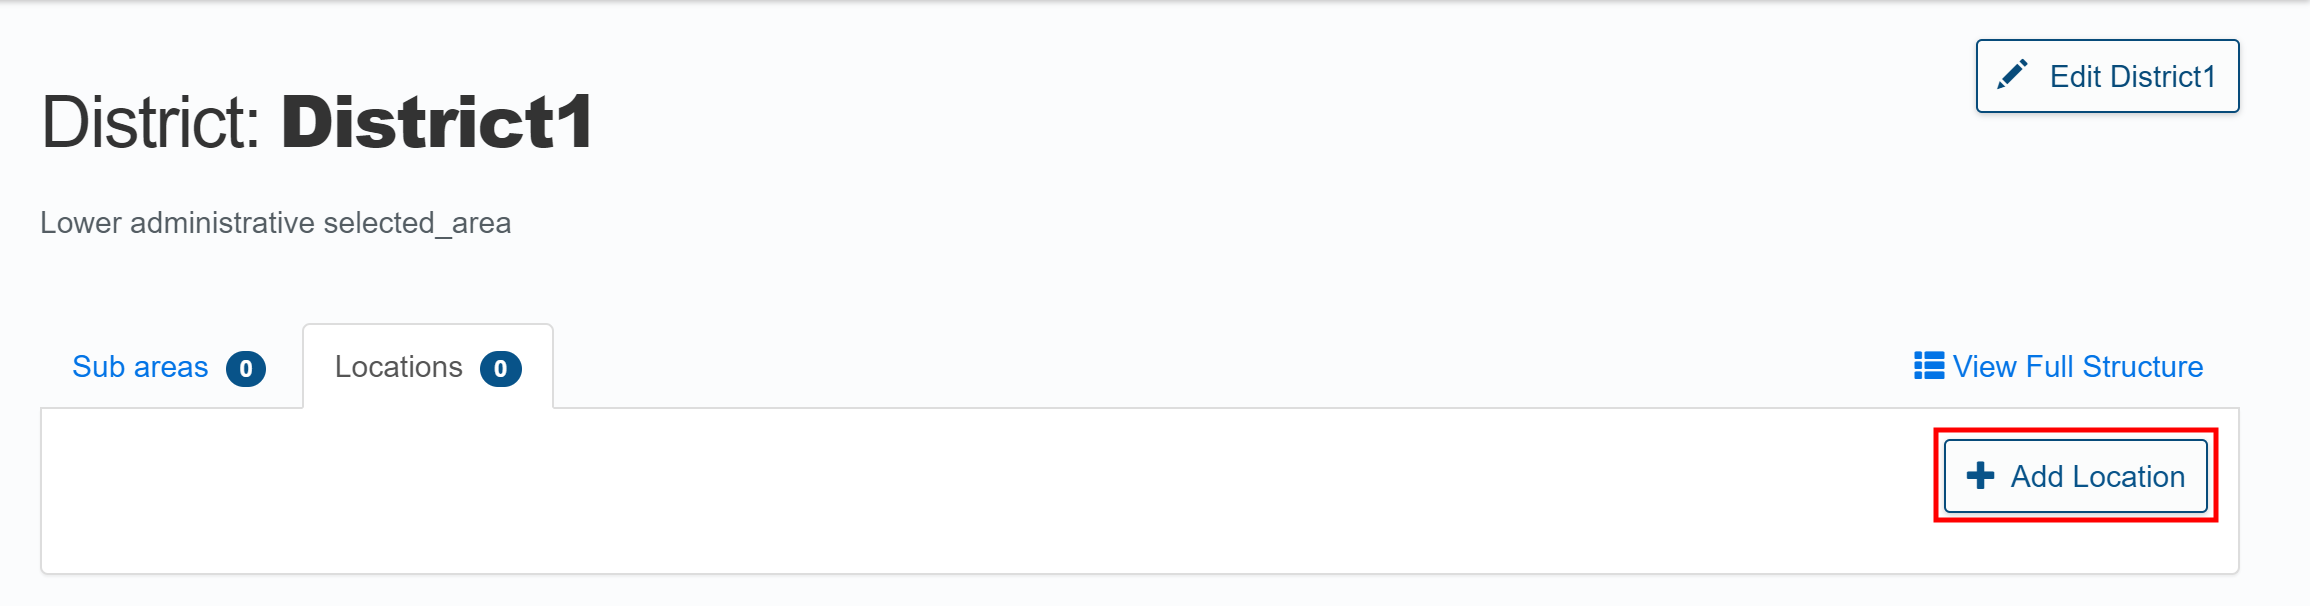
In the Locations tab of the target administrative area, click .
-
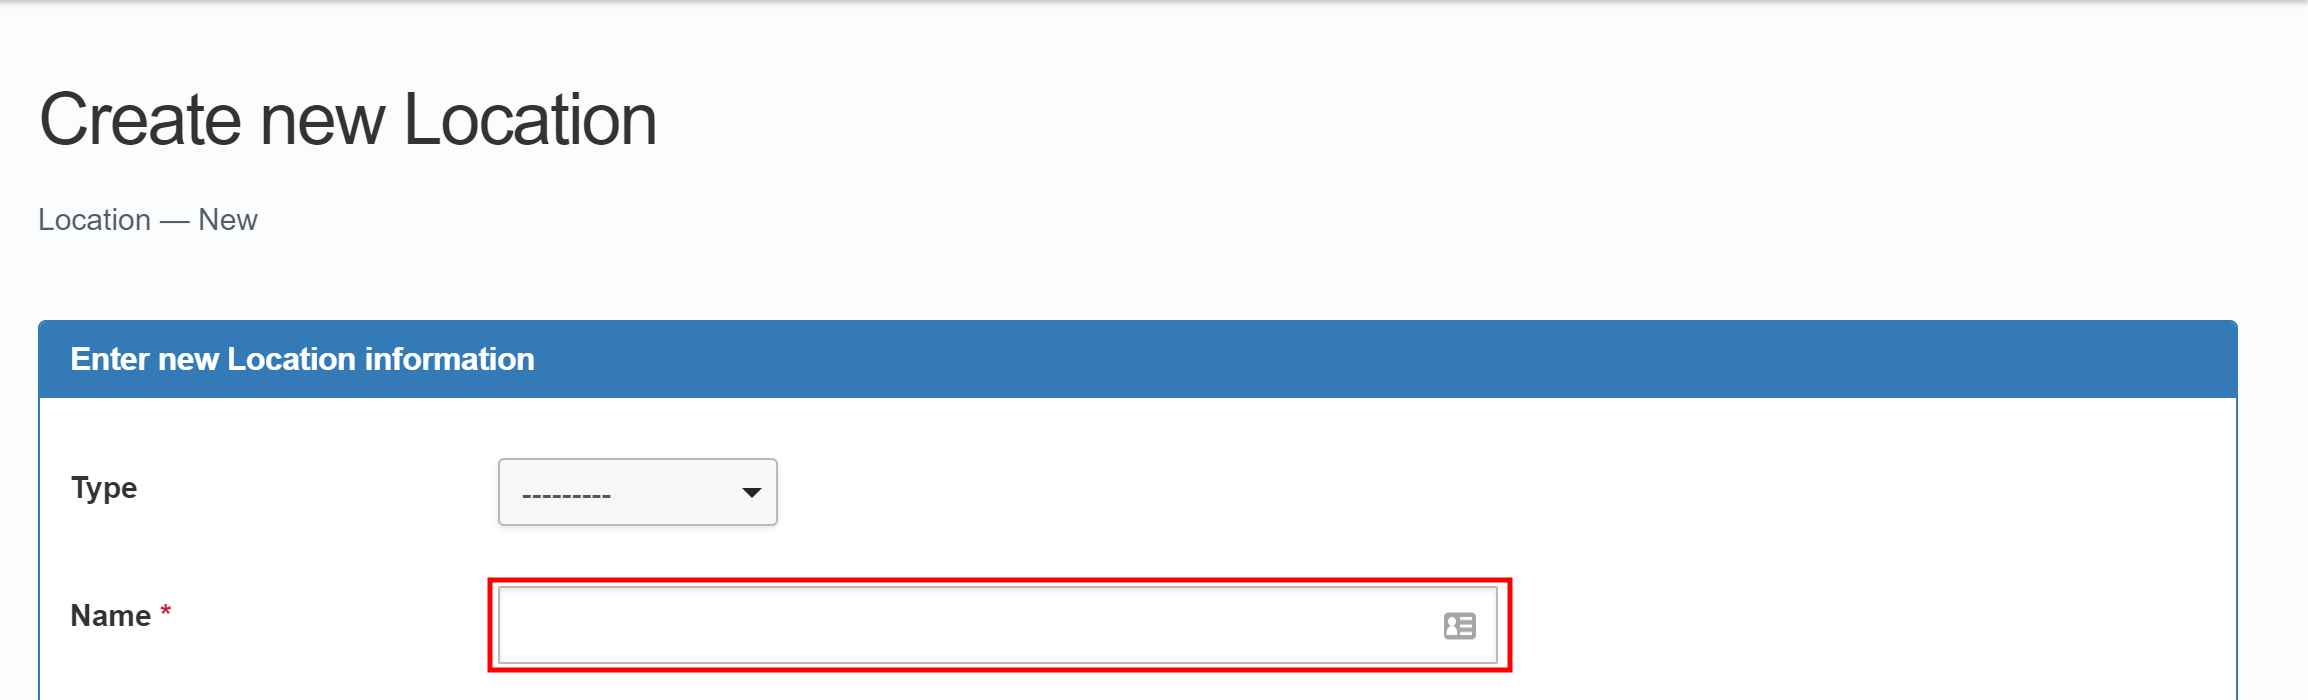
In the Create new Location page, enter the name for the location and enter any other details required by your Country Office.
-
Check that the details are correct, and click to finish adding a location.
